Since it's still winter (brrrr...) and these are thank you cards for Christmas gifts, I figured it'd be okay if these still looked a little Christmassy. I decided on this Penny Black snowman stamp. He's such a cutie and is pretty quick and easy to color. I did him two different ways - one on white cardstock, the other on Kraft cardstock.

The first one was stamped on Kraft cardstock. (I'm entering this one into Jeanie's That's Krafty Thursday Challenge #45!) His body was done using a watercolor pen and a SU! White Craft ink pad. I found this technique on another blog, but can't remember which one!! I dragged some of the ink pad right onto an acrylic block then used the watercolor pen and that ink to color the snowman's body. I used Prismacolor Pencils blended with gamsol to color his scarf, arms and earmuffs. I added some light blue shading around the image, which looks more like white in the picture, but it really is light blue! After doing a little machine stitching around the edges, I just added some Martha Stewart snow glitter, some Stickles and a couple of punched snowflakes.
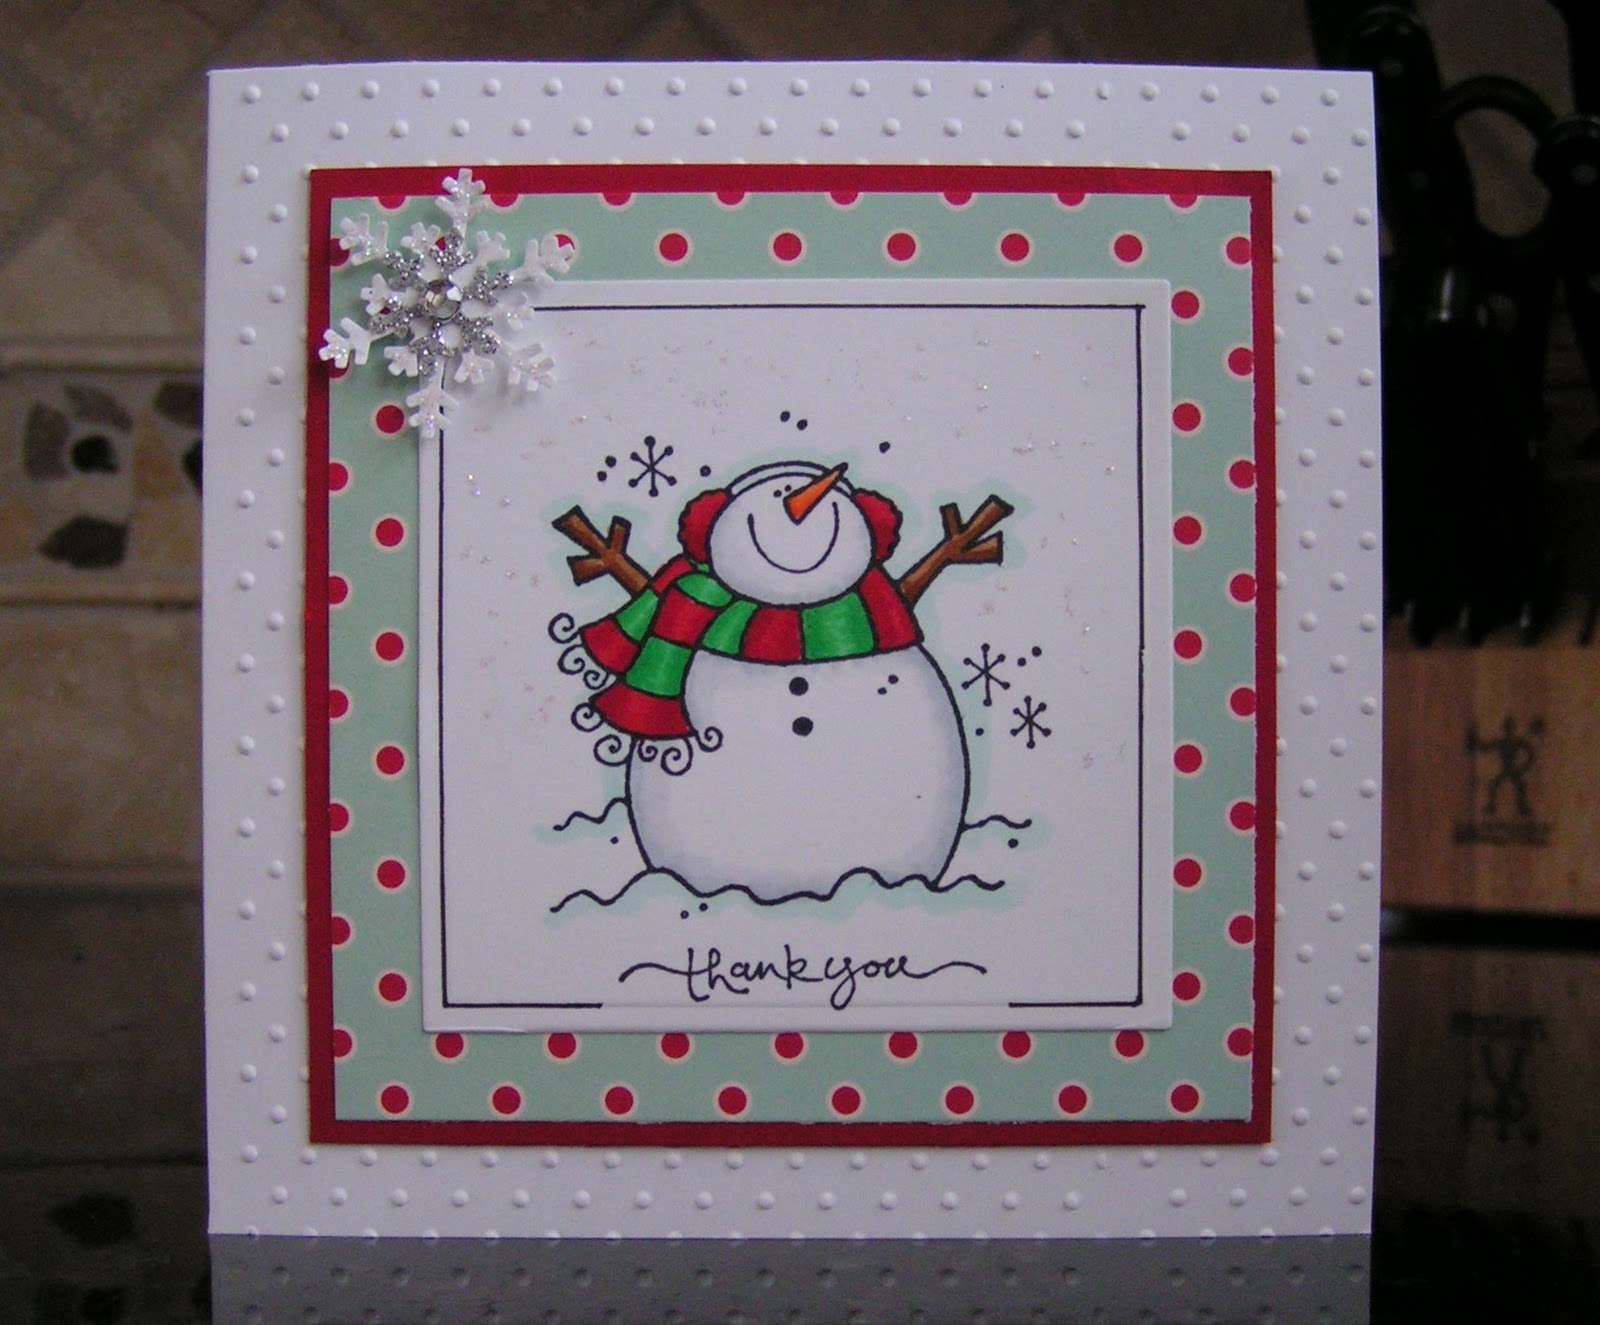
This one was colored with Copics on Bella's Bestest paper. I liked this one right away; it's bright, crisp and clean looking! So I went ahead and kept the completion of the card pretty simple too. Just a run thru the Cuttlebug for some texture, some layered paper and cardstock with some Stickles dotted here and there and a jeweled snowflake. (gotta have a little bit of bling, you know what I'm talking about?!!) 

I used a technique that I found on Jodi Collins' blog here (love her cards!) to create a frame. After stamping and embossing your image, remove it from the die and stamp the sentiment somewhere near the bottom edge. Then pop the image back into the die and trace around the inside edge with a Copic Multiliner leaving some space on either side of the sentiment. Isn't this a cool technique and so easy to do!! I think it works best with words that are printed versus handwritten style since the handwritten styles seem to all go below the line you want to stay above.
I like how both of these turned out! One is kind of warm and cozy, the other one crisp and clean! Which one do you like best??
I have one more snowman that I'm working on and a cute little Ellzybells stamp that I had in my stock. (Note: I just found out that these are no longer being made - how sad is that?!! - they were so cute) As soon as I get some more finished, I'll get them posted.
Hope you have a great weekend!!